Quick Start
PioCloud is a service that lets you solve PioSOLVER sims in the cloud and access the results from anywhere. It is designed to be easy to use, and we think it has something to offer for a variety of users:
- Users with limited hardware can solve trees on PioCloud without needing to invest in expensive hardware.
- Users who want to build libraries and access them from anywhere can use PioCloud to store and access their sims.
- Users who want to share their sims can use PioCloud to give others access to their sims without needing to send files around.
This quick start guide walks you through the the steps to solve a spot on PioCloud:
- Log in
- Define a Job
- Name the Spot
- Input Job Settings
- View Cost
- Confirm and Start
- View or Download Results
Log In and Credits
To use PioCloud, you need a PioCloud account, and you will have to log in before you can run or access the results of jobs.

Click the Sign up link if you need to create an account. When creating an account, use the email address associated to your PioSOLVER license. If your PioSOLVER license is within the support period (because it or a support extension was purchased in the last 12 months), you will receive a certain number of free credits to use on PioCloud.
Credits
You will need to have credits on your account to run jobs on PioCloud. Once you have logged in, you can see your current credit balance and purchase credits from the account page.
Define a Job
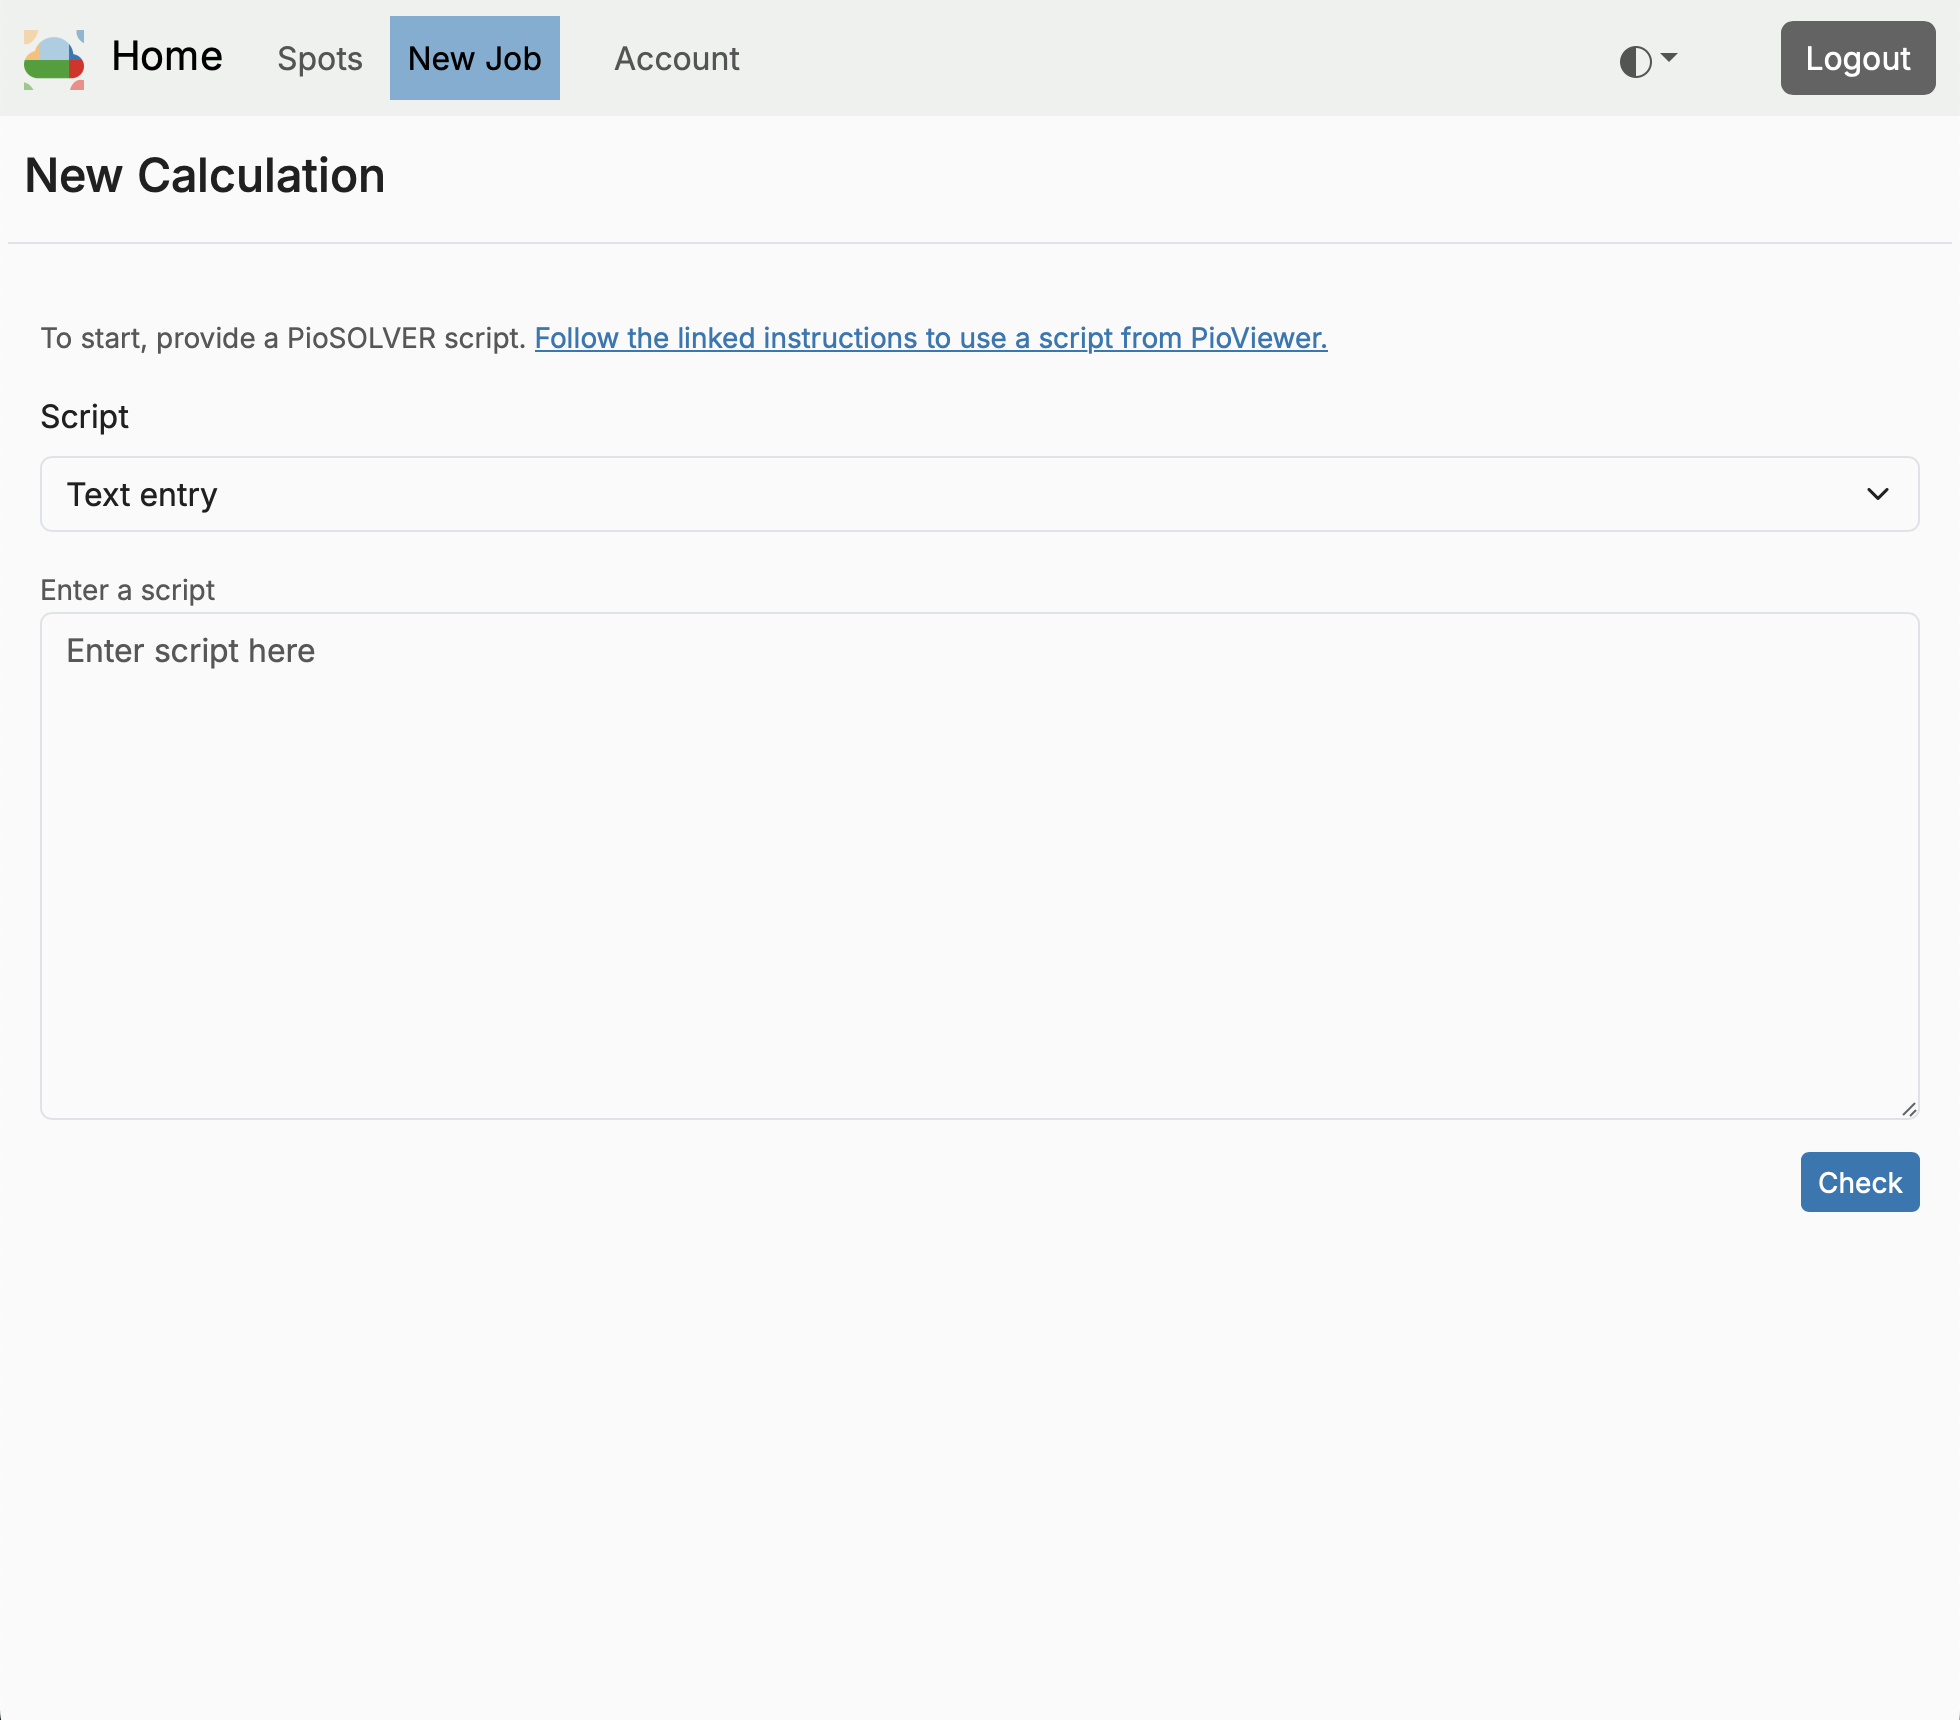
The easiest way to define a job for PioCloud is to do so from PioViewer. On the Postflop Tree Building and Calculations tab, define a job as you normally would and then click the Solve in PioCloud button. In the window that appears, you should use the button to copy the script to the clipboard, and then follow the link to the PioCloud website to create a new job.

On the PioCloud website, you can paste the script into the text entry input box and click Check to have the script verified and move on to the next step.
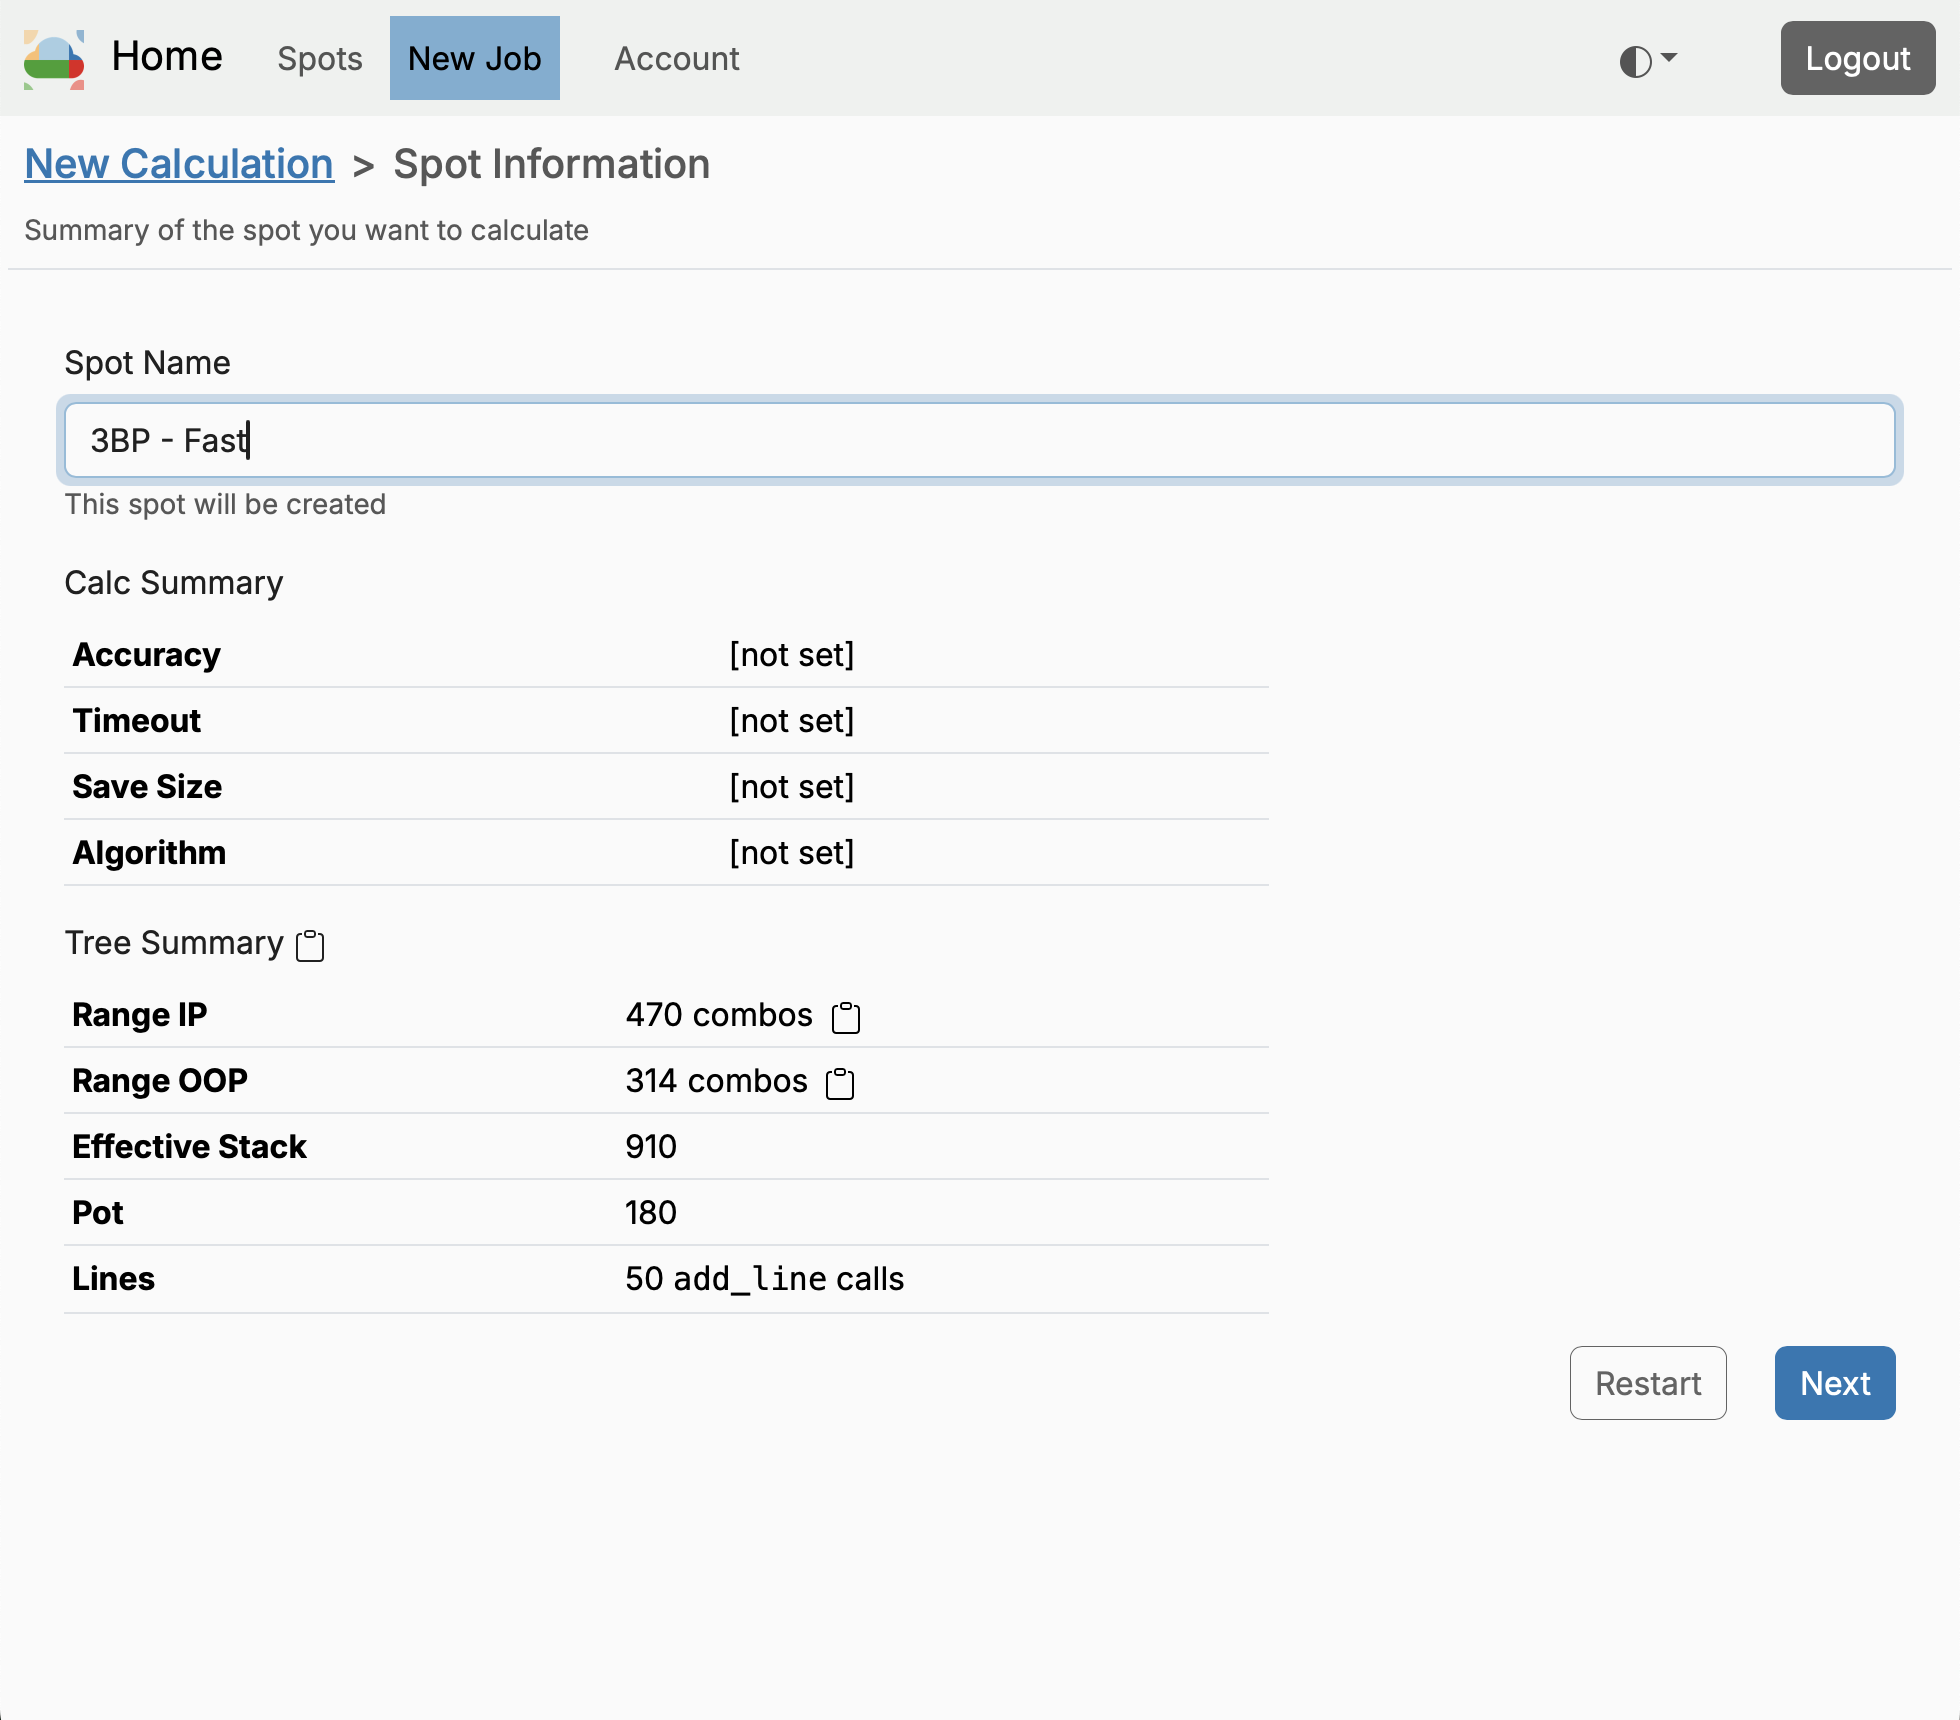
Name the Spot
Creating a Job will also create a new spot, and you will probably want to give the spot a descriptive name. (The name can be changed later.)
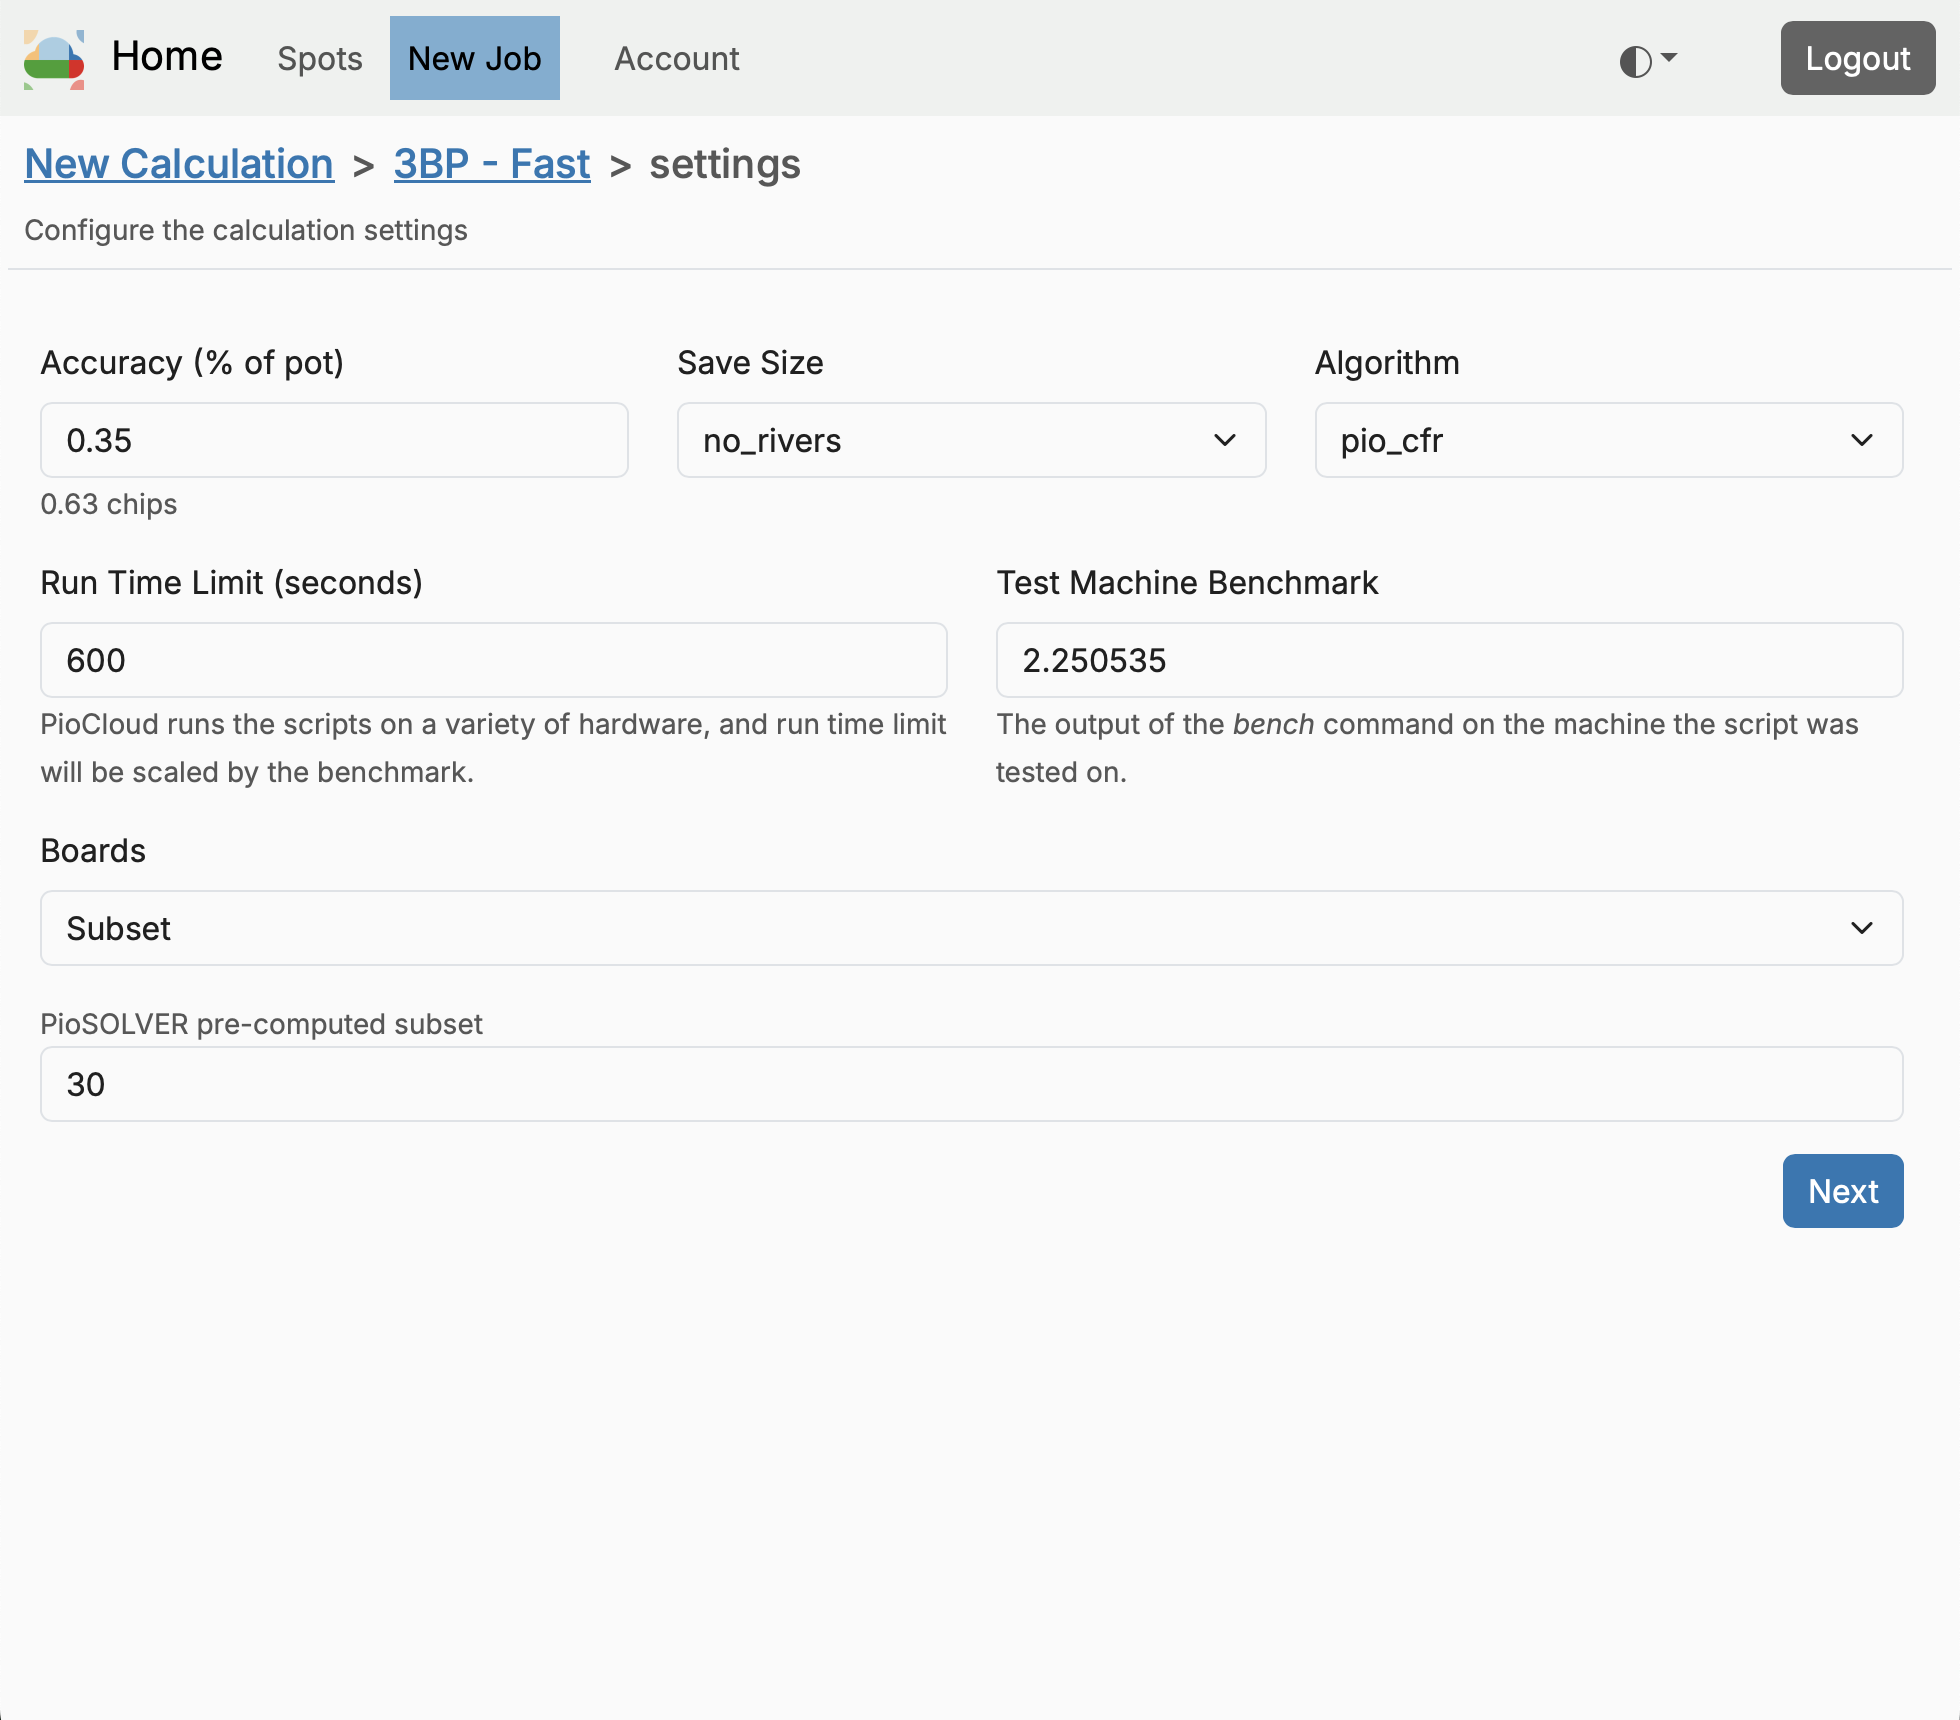
Input Job Settings
Provide the parameters needed to run the job. The Algorithm, Run Time Limit, and Boards must be provided by the user; the other parameters are initialized to default values.
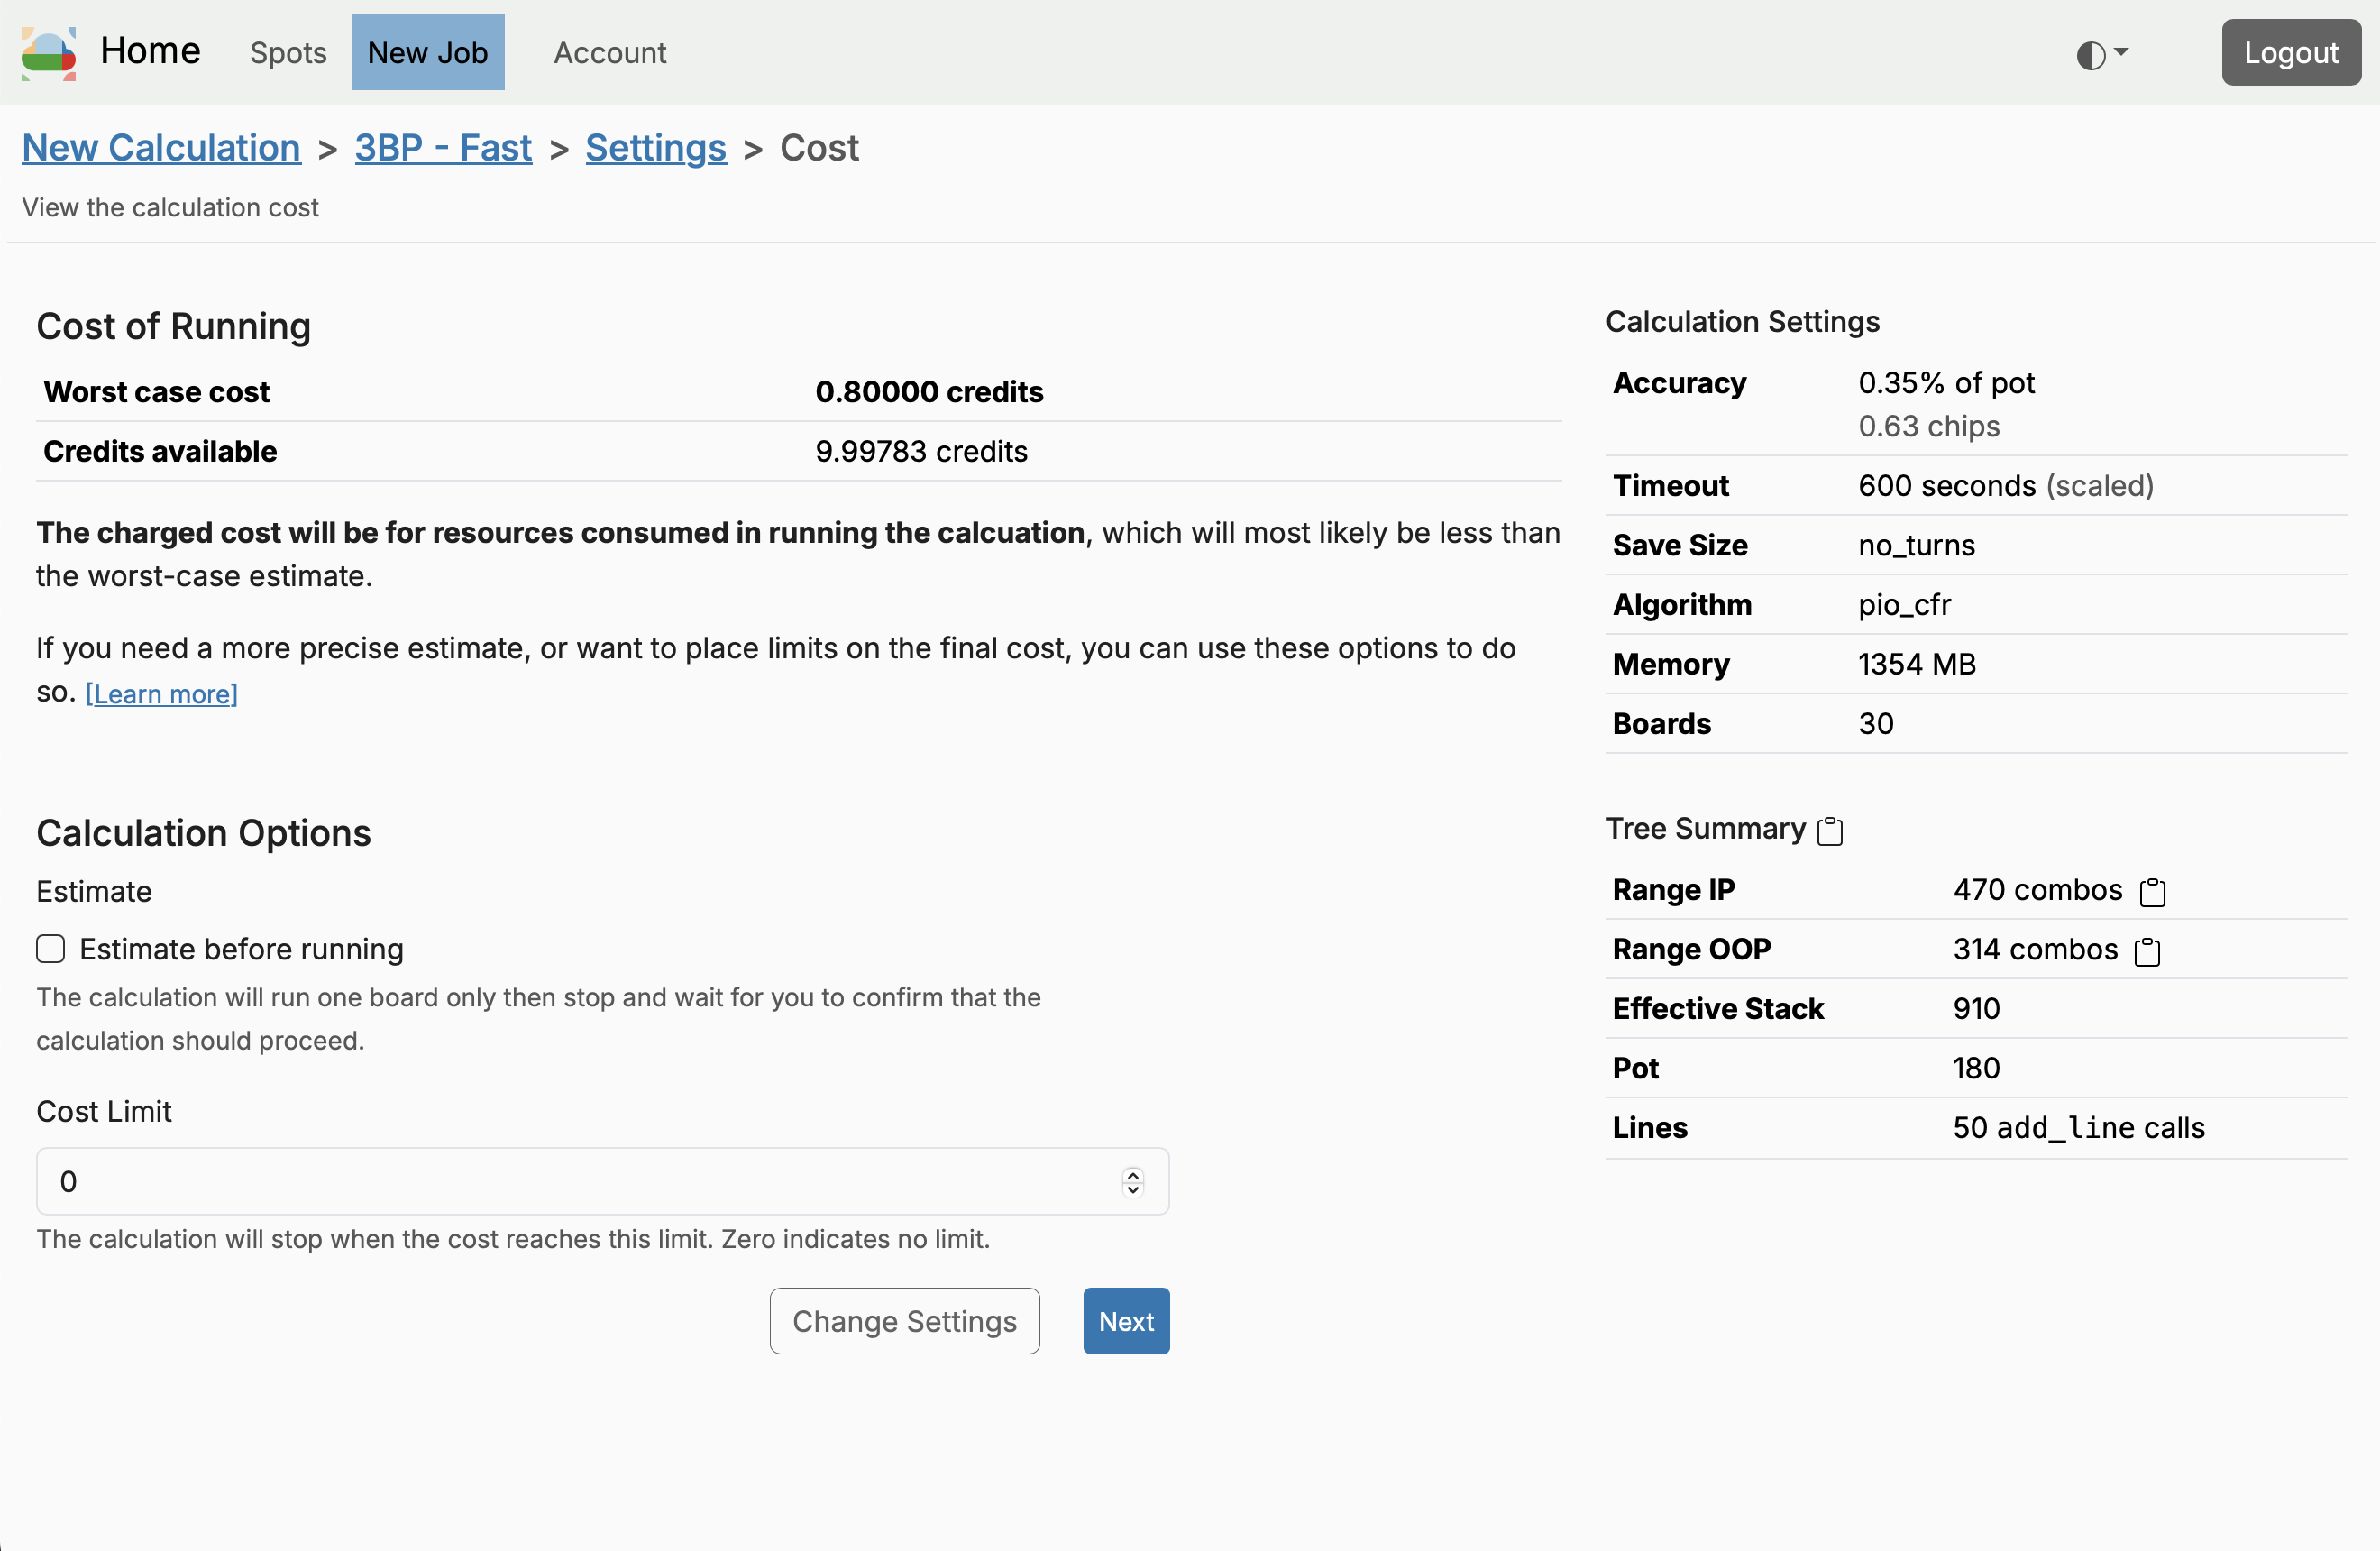
View Cost
The cost page informs you about how much the job will cost to run. The cost shown is the worst-case cost that will be incurred if all the jobs run until they reach the timeout. Most jobs are much cheaper than the worst-case cost. See the Cost Control section for more information on how to control the cost of your jobs.
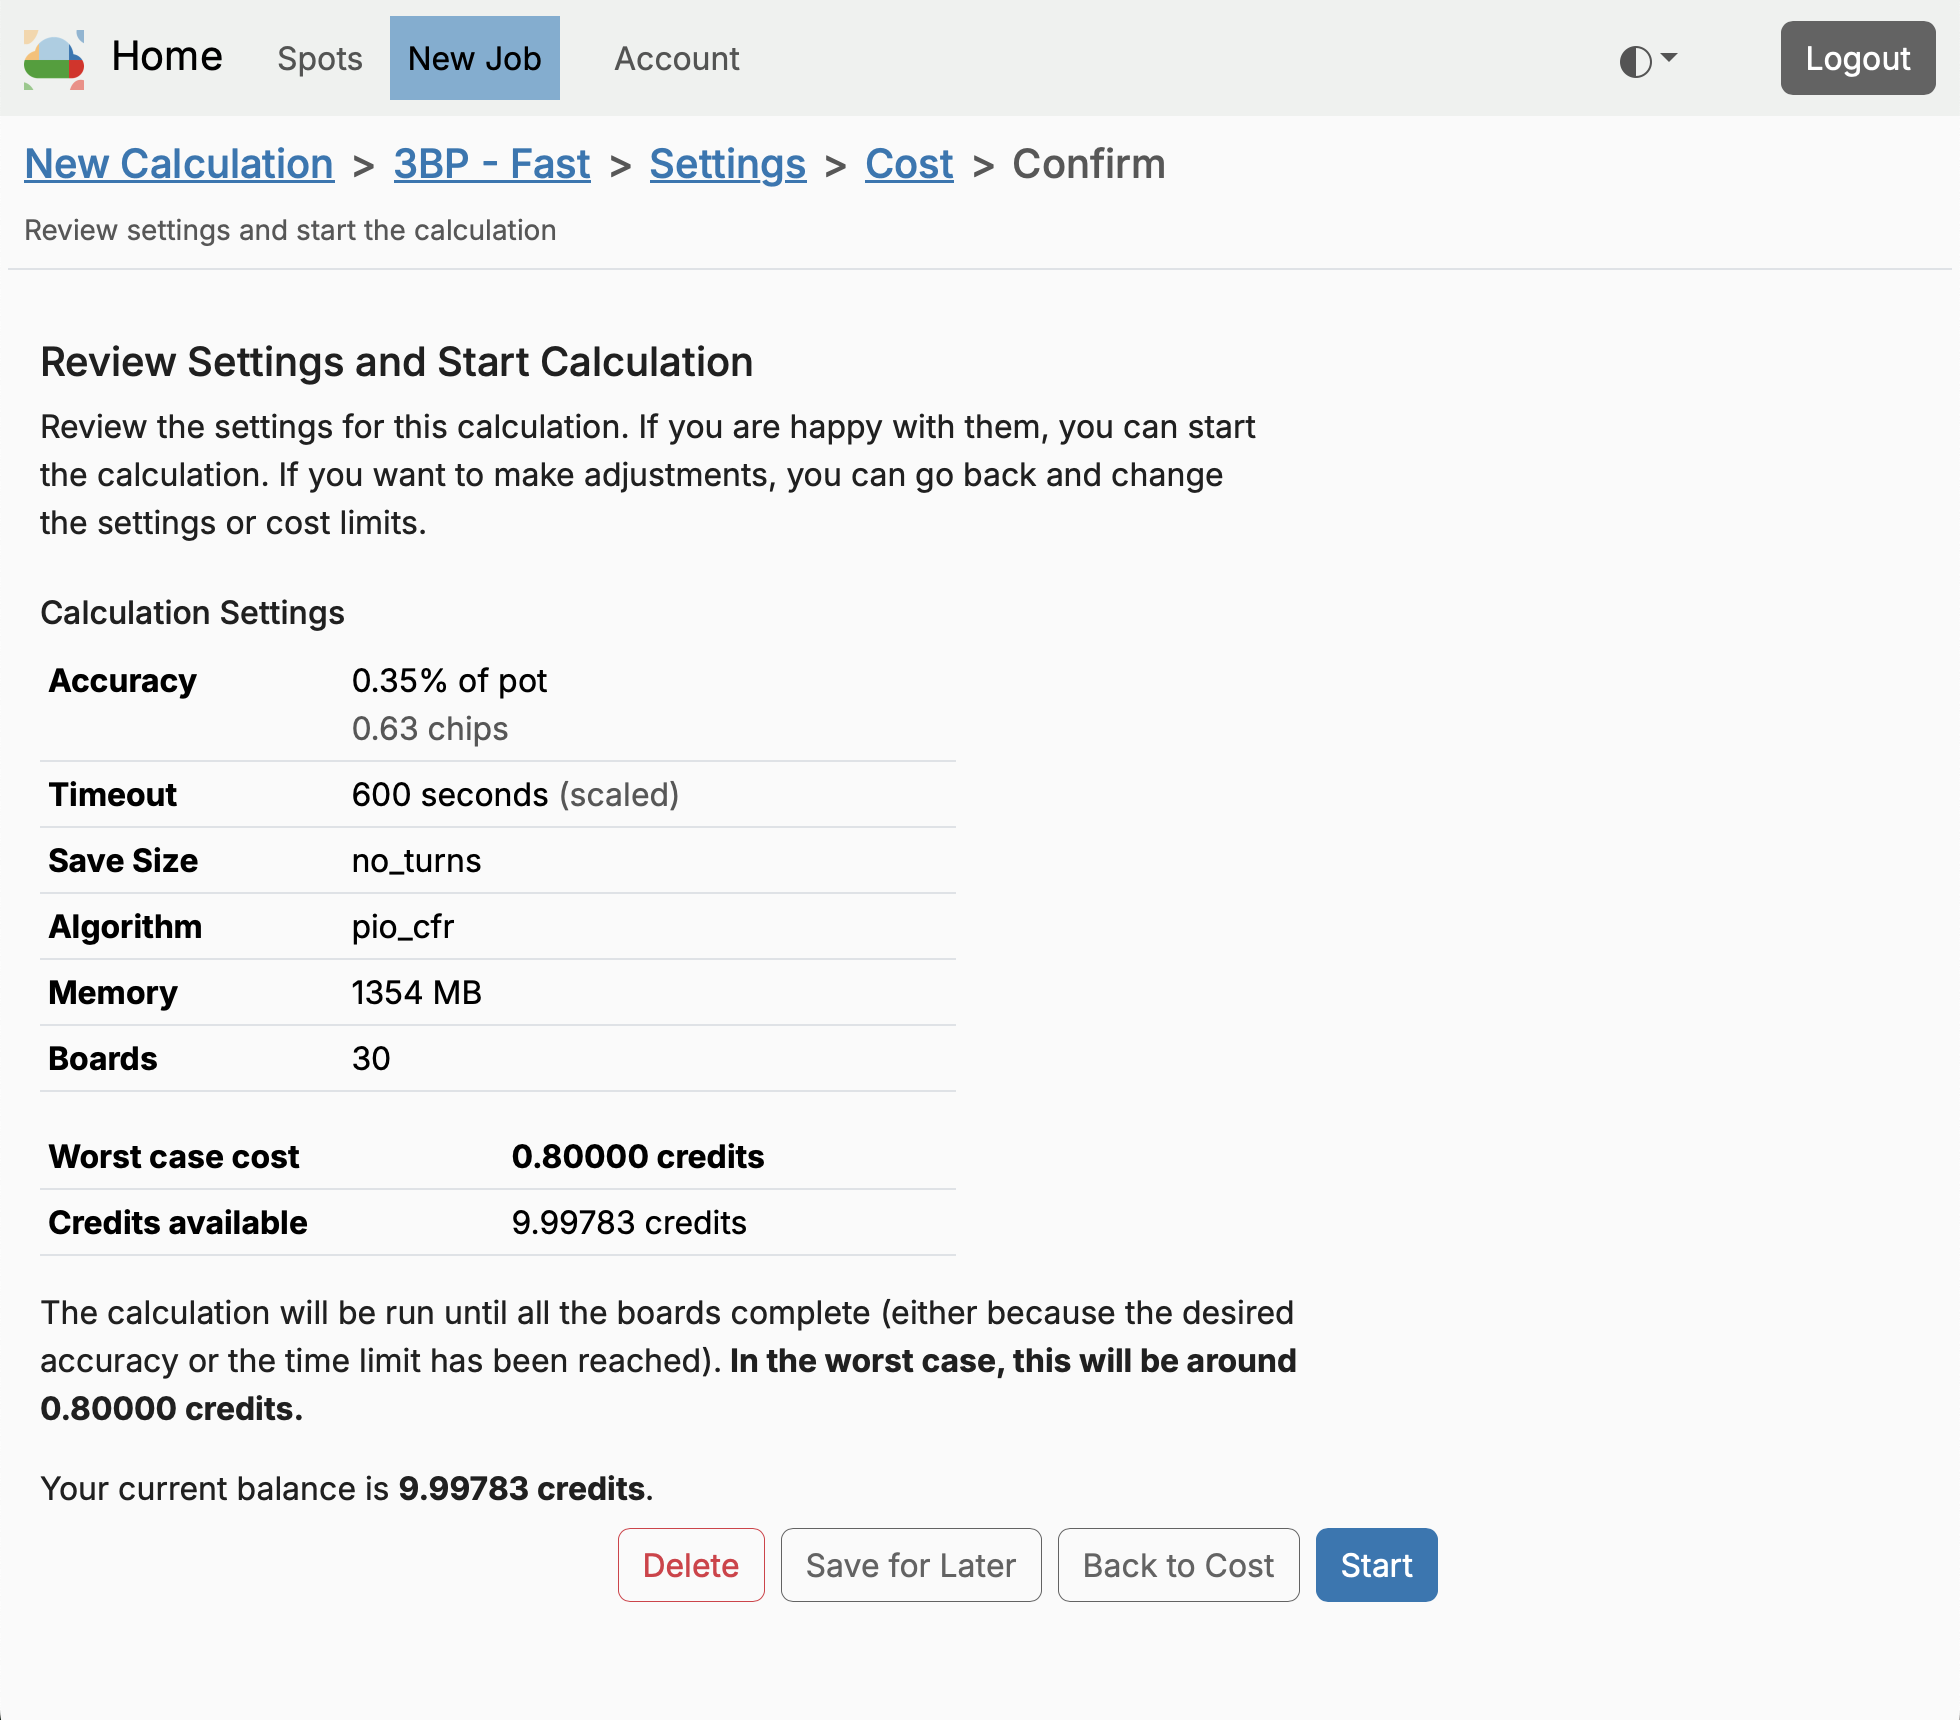
Confirm and Start
The final step is to review details about the job and confirm that you want to run it. Assuming that you are happy with the job as configured, you can click Start to schedule the job.
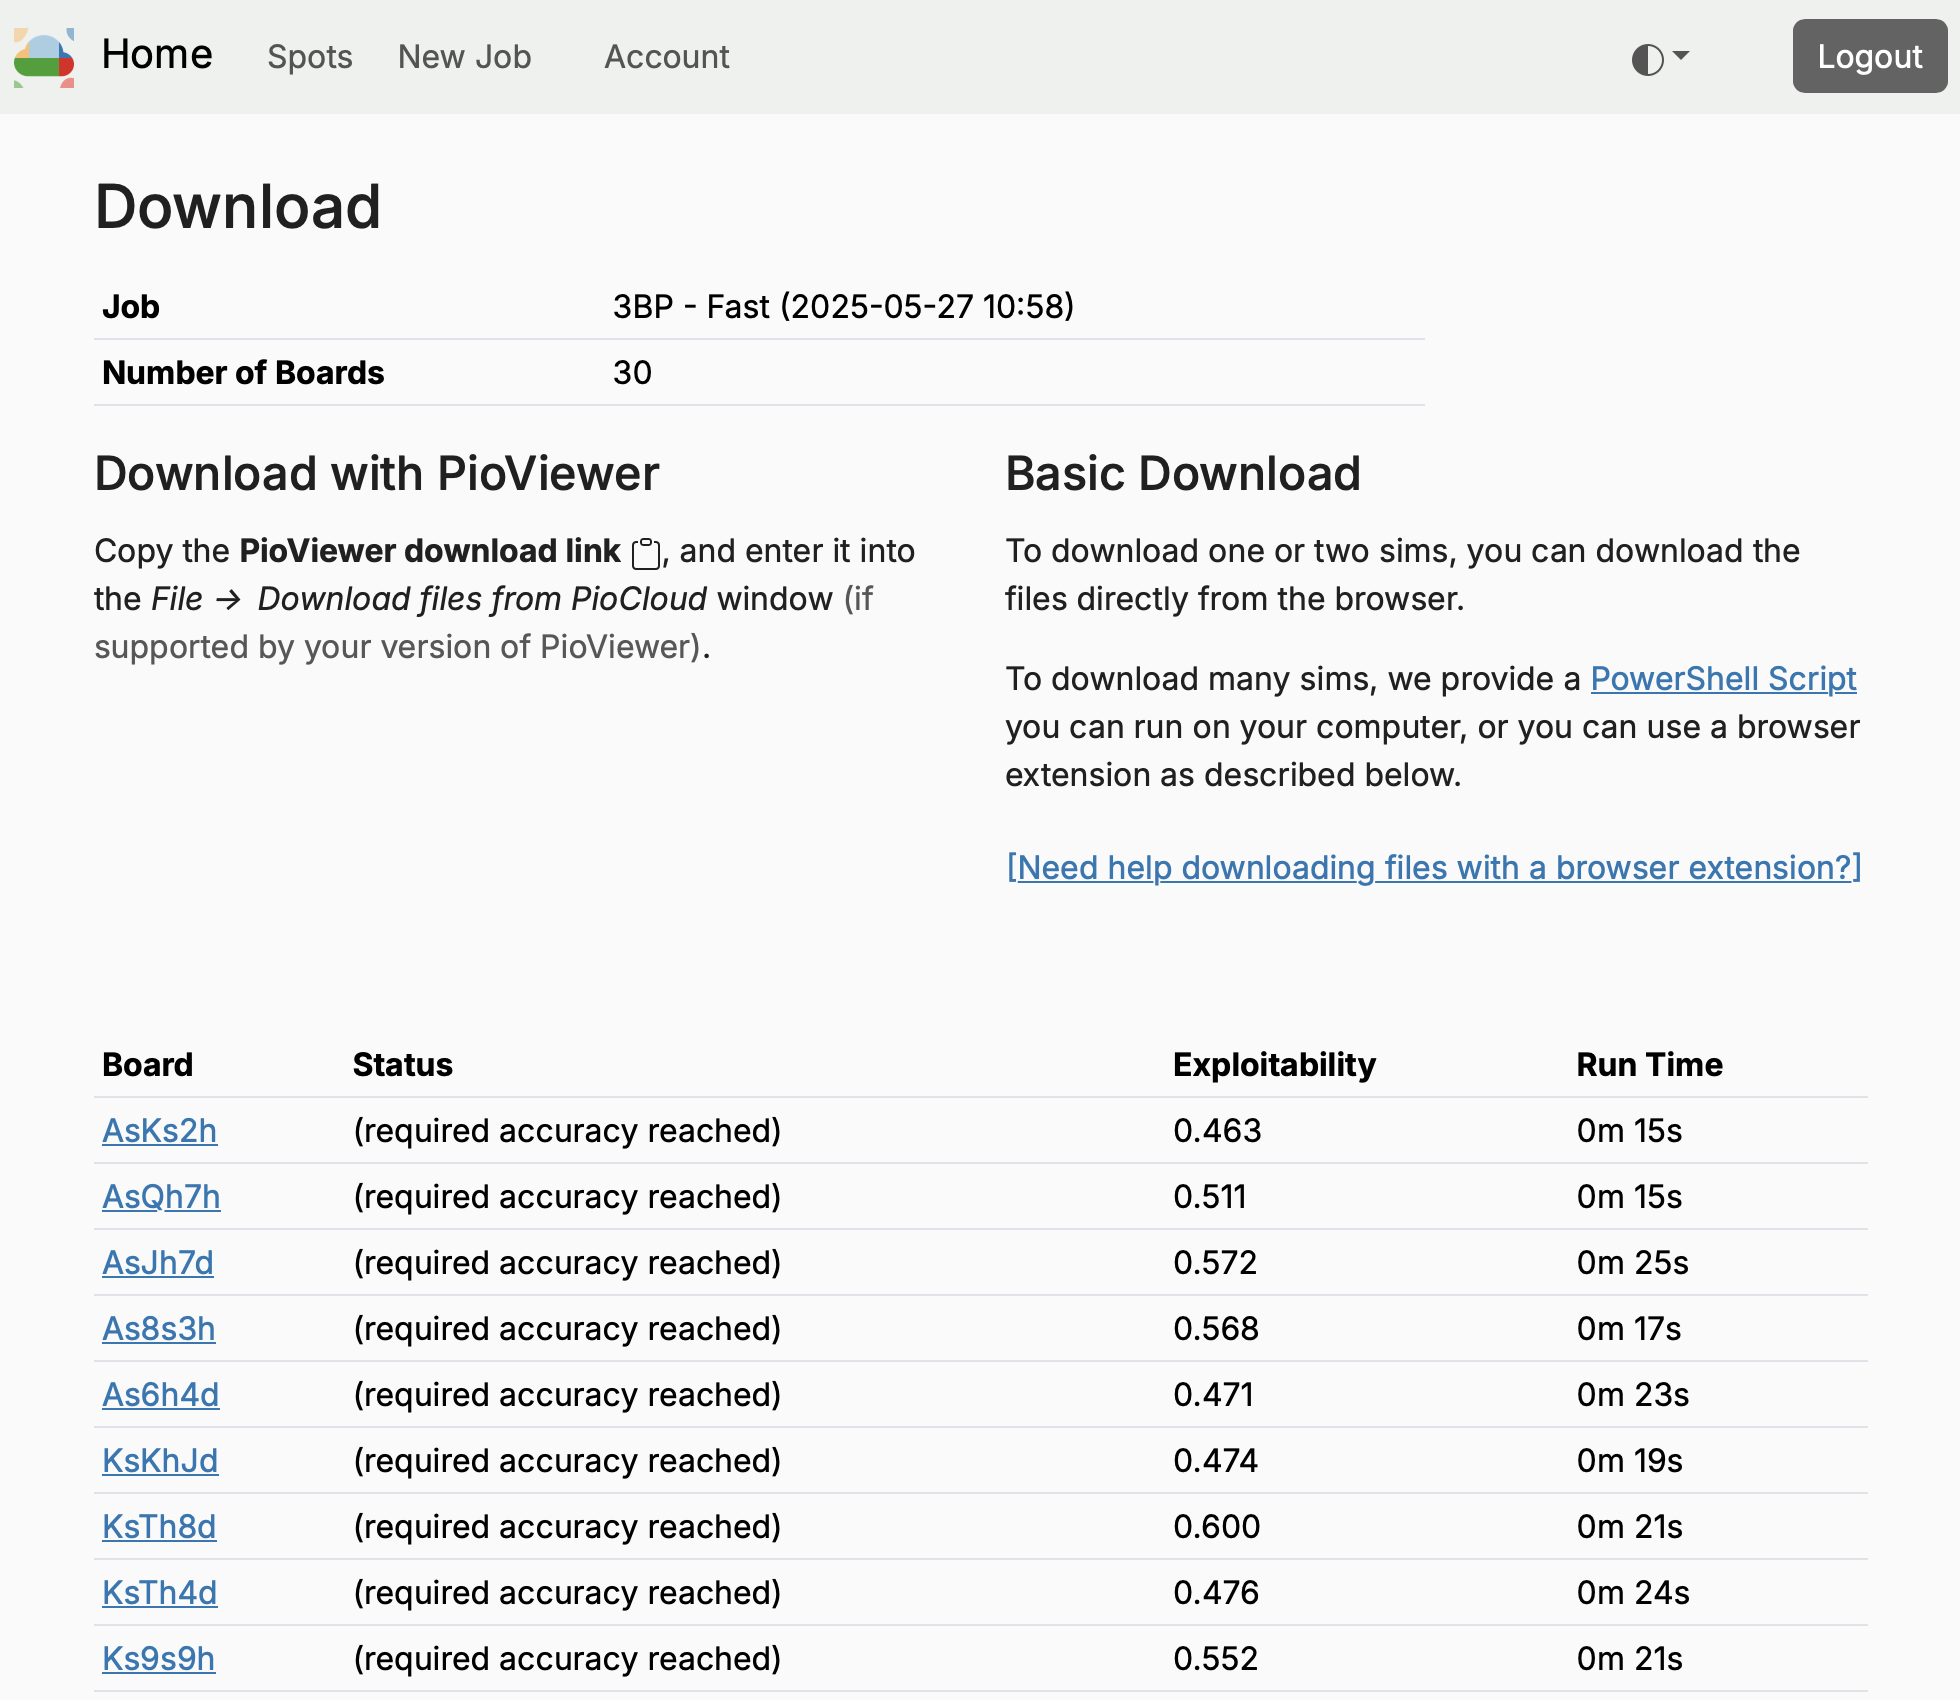
View or Download Results
Once the job has been started, you can see the progress on the job as it runs. This page will update periodically. When the job is finished, you will receive an email notification with a link to the job.

The download page gives an overview of the job and instructions on how to download the results.
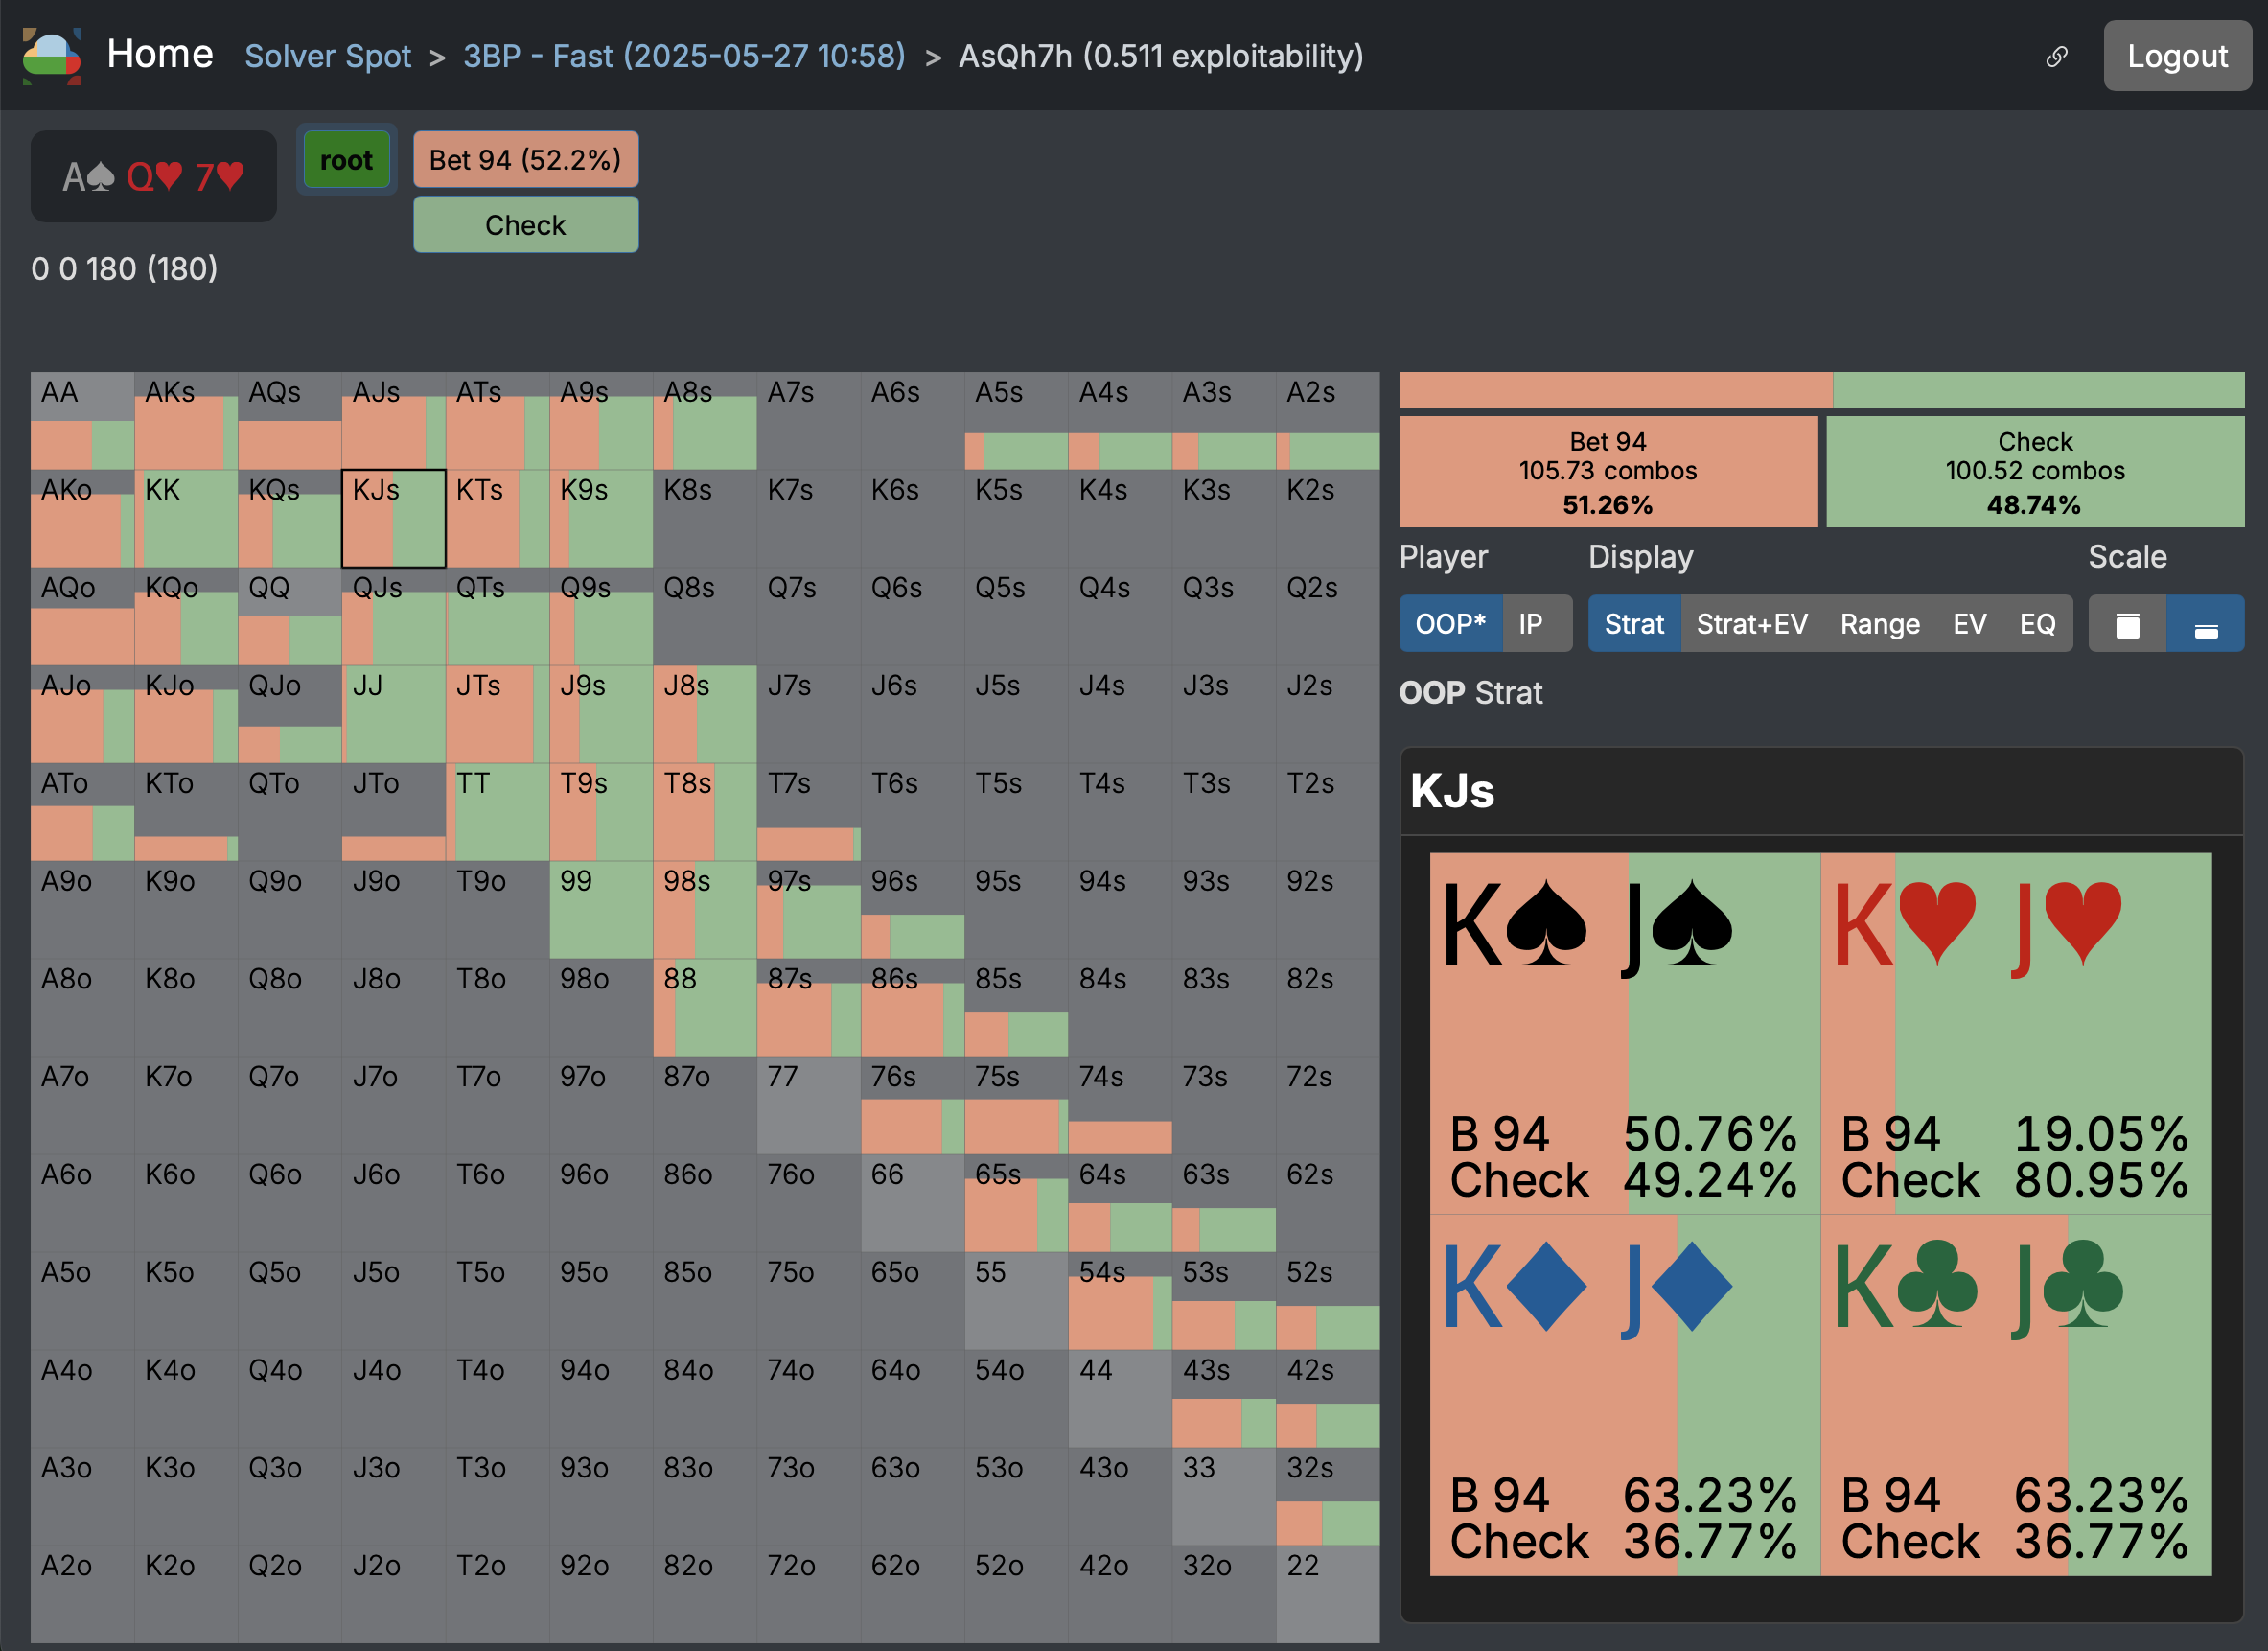
You can also view the results in the cloud viewer.